Basement Gyms Deliver 15 Percent Return on Investment Amid Rising Fitness Trends
A well-finished basement gym provides everyday accessibility, eliminates gym membership fees, and generates a tangible boost to home value upon sale. Current data indicates that prospective buyers prioritize a dedicated home workout area nearly as highly as a home office. Proper execution ensures durability, safety, and versatility, making the investment worthwhile even in fluctuating markets.
Key Cost Considerations
Understand the primary expenses to budget accurately for your basement gym conversion. These factors influence both initial outlay and long-term value.
1. Space Dimensions and Ceiling Clearance
Basement gyms require a minimum of seven feet of headroom to accommodate standard equipment like pull-up bars or weight racks. If clearance falls short, excavation or foundation underpinning may cost between $40 and $80 per square foot. Measure your space precisely before purchasing gear to avoid modifications.
2. Moisture Control and Insulation
Effective waterproofing addresses common basement seepage issues and costs $1,500 to $5,000. Neglect this step, and you invite damage to flooring or health risks from mold growth. Insulation, at $2 to $3 per square foot, enhances thermal comfort and reduces noise transmission to upper levels.
3. Durable Flooring Options
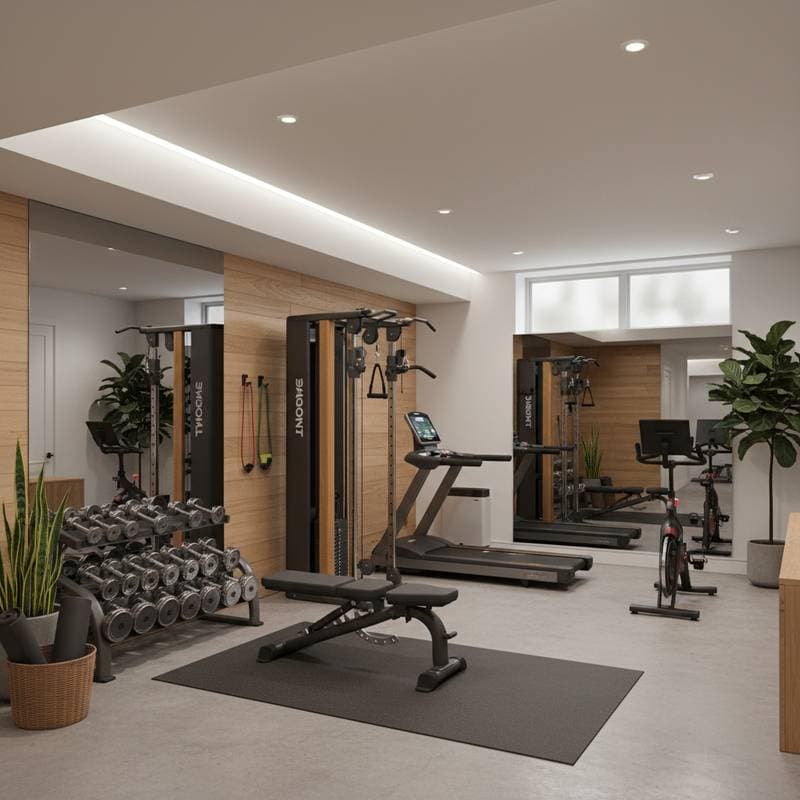
Select rubber mats for basic coverage at $3 to $6 per square foot, or invest in subfloor systems with integrated vapor barriers for up to $10 per square foot. Prioritize materials that offer superior grip and impact cushioning to prevent injuries. Consider interlocking tiles for easy replacement in high-traffic zones.
4. Electrical Upgrades and Lighting
Allocate $1,000 to $3,000 for additional outlets, robust overhead illumination, and dedicated circuits suitable for power-hungry devices like ellipticals. Incorporate dimmable LED fixtures and strategically placed mirrors to amplify the sense of openness. Consult local codes to ensure compliance with energy standards.
5. Heating, Ventilation, and Air Circulation
Installing supply and return vents typically ranges from $500 to $1,500. Complement this with a compact dehumidifier or air filtration unit for an additional $200, maintaining optimal conditions during workouts. Proper airflow prevents stale air buildup and supports equipment longevity.
6. Wall Finishes and Acoustic Treatments
Drywall installation and painting average $2 to $4 per square foot for a clean, professional appearance. Add acoustic panels or enhanced insulation between floor joists for $800 to $1,200 in a standard-sized room to minimize sound leakage. Opt for semi-gloss paints that resist wear from sweat and frequent cleaning.
7. Required Permits and Inspections
Budget $300 to $900 for permits covering structural changes, electrical work, and emergency egress modifications. Research your locality's building codes early to streamline approvals. Professional inspections verify safety and can prevent costly rework.
8. Debris Removal and Site Preparation
Account for $300 to $700 to handle demolition waste, outdated flooring, or concrete debris. Factor this into your timeline to sidestep unexpected delays or fees from waste disposal services. Rent a dumpster for larger projects to simplify cleanup.
Deciding Between DIY and Professional Installation
Evaluate your skills and the basement's condition to choose the right approach. This decision impacts both cost savings and project quality.
Pursue DIY If
- The basement remains dry and partially finished.
- Existing electrical and HVAC infrastructure suffices.
- Your focus stays on flooring, painting, and equipment arrangement.
- You possess essential safety equipment, including gloves, masks, and knee pads.
Engage Professionals If
- Evidence of wall cracks, dampness, or mineral deposits appears.
- New electrical circuits or ventilation systems prove necessary.
- Alterations to plumbing or ceiling height enter the plans.
- Local regulations mandate permits for structural or wiring tasks.
Intermediate to advanced skills suit most DIY efforts, with each phase requiring at least a full weekend. Essential tools include a power drill, circular saw, flooring cutter, moisture meter, stud finder, respirator, safety glasses, level, utility knife, and shop vacuum. Common risks involve foundation damage from improper cuts or humidity issues from inadequate ventilation; seek licensed experts for complex elements.
Ongoing Maintenance and Warranty Essentials
Sustain your basement gym's functionality and appeal through regular upkeep. This preserves both health benefits and investment value.
Daily and Seasonal Routines
Clean rubber flooring weekly using a mild, non-abrasive solution. Operate a dehumidifier in humid seasons to control moisture levels. Inspect corners quarterly for signs of condensation or mold, and annually tighten all wall-mounted fixtures and ceiling anchors.
Warranty Coverage
Most flooring warranties span five to ten years against normal wear. Equipment typically carries one to three years of standard protection, with options for extensions. Lighting and ventilation components offer about two years when installed correctly.
Strategies to Prolong Durability
Maintain indoor humidity under 55 percent to deter deterioration. Place protective mats beneath heavy apparatus to distribute weight evenly. Refresh wall surfaces with mold-resistant paint every three to five years for sustained hygiene.
Ensuring Safety and Regulatory Adherence
Prioritize safety from the outset to protect users and comply with standards. This step safeguards your investment and family well-being.
Pre-Project Preparations
Conduct tests for radon gas and moisture levels before any work begins. Disconnect power at the main breaker prior to handling electrical components. Install GFCI-protected outlets in moisture-prone areas. Verify egress pathways meet code if enclosing spaces with walls or doors.
Elements That Require Permits
Any structural framing or wall modifications. Installation of new electrical circuits or ductwork. Additions like bathrooms or plumbing adjustments.
Essential Protective Equipment
Safety glasses and gloves for all tasks. Dust masks and ear protection during cutting operations. Non-slip footwear throughout the installation process.
Omit these precautions, and you expose yourself to electrical hazards from circuit overloads, subfloor mold proliferation, or inspection failures that delay resale.
Implementing Your Basement Gym Project
Follow this structured plan to execute the conversion efficiently. Each phase builds toward a functional, value-adding space.
- Inspect and seal the basement against leaks and excess humidity.
- Sketch a layout dividing the area into cardio, strength training, and stretching zones.
- Map out electrical and lighting placements ahead of enclosing walls.
- Lay flooring and mount mirrors after confirming moisture stability.
- Position equipment and add cushioning mats for safety.
- Perform comprehensive tests on outlets, airflow, and illumination.
Focus foremost on robust moisture management, as it averts expensive future repairs to surfaces. If construction material costs rise, initiate with waterproofing and basic wiring, then complete finishes later. Proceed immediately if gym memberships drain your budget or if preparing for a home sale, as returns materialize swiftly.
Actionable Steps to Launch Your Project
- Acquire a moisture testing kit to assess your basement's suitability.
- Obtain quotes from two or three contractors, specifying waterproofing and electrical inclusions.
- Establish a detailed budget with a 10 percent contingency for unforeseen expenses.
- Identify priority zones for phased completion if funding spreads over months.
- Schedule your inaugural home workout upon verifying ventilation and flooring integrity.