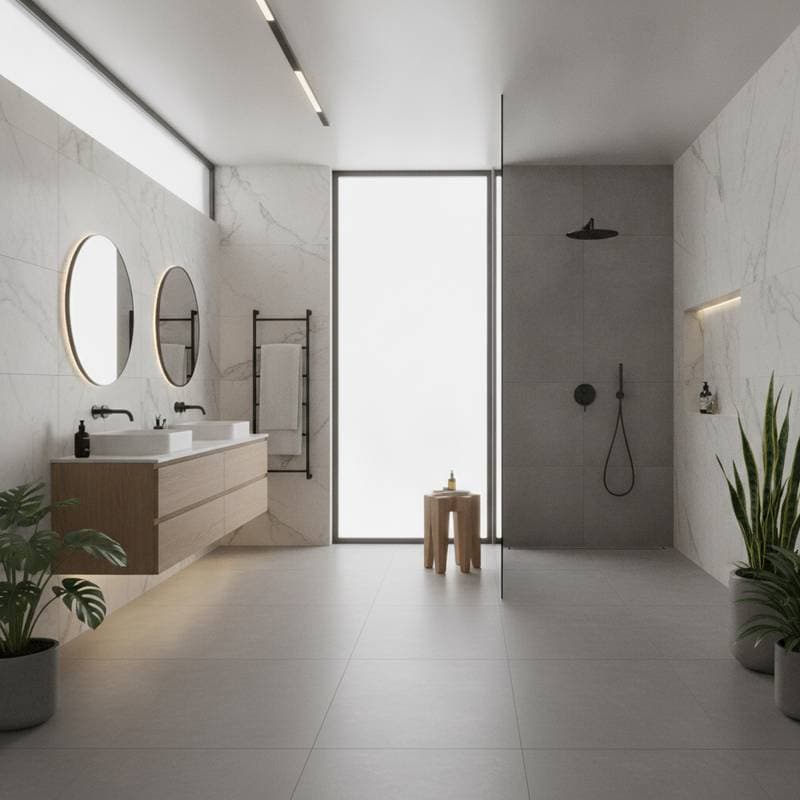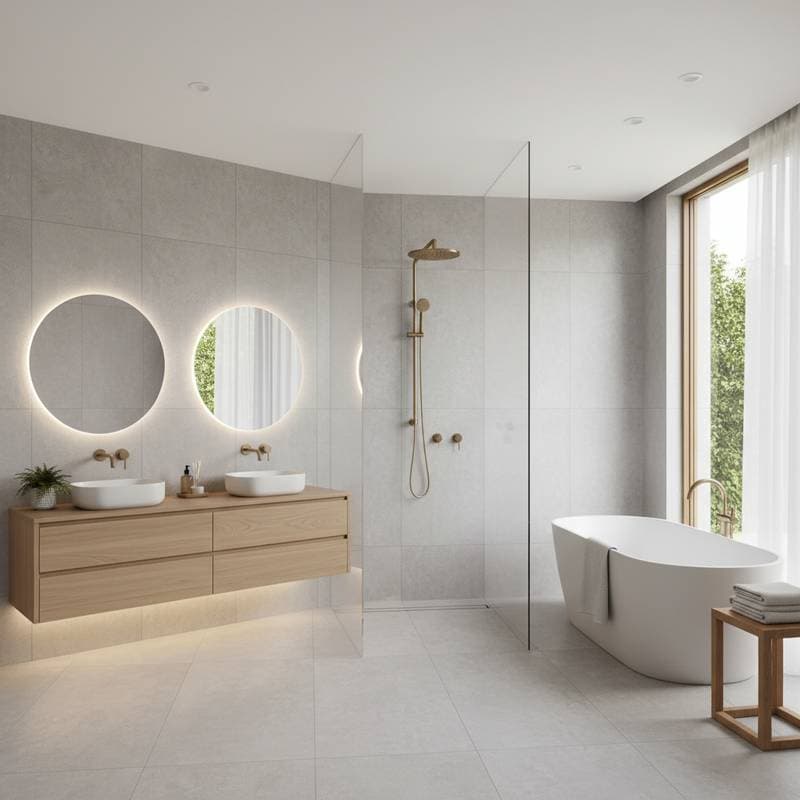
Wet Rooms: Unlock Rapid Home Value Growth in 2025
A wet room elevates your home's value swiftly through its streamlined appearance, indulgent atmosphere, and alignment with contemporary living. When designed thoughtfully and constructed securely, the benefits prove substantial.
This guide outlines strategies for planning, budgeting, and completing a wet room that delivers enhanced comfort and tangible market appreciation.
The Value Proposition of Wet Rooms
Wet rooms increase property worth by expanding the perception of space in compact areas. The barrier-free layout eliminates obstructions, enhancing aesthetics and ease of access.
Prospective buyers prioritize bathrooms that require minimal upkeep and embody modernity. Wet rooms fulfill these preferences while supporting aging-in-place modifications, upscale aesthetics, and operational efficiencies. Real estate professionals observe that properties featuring updated bathrooms attract quicker offers.
The investment yields impressive returns, particularly when replacing obsolete tubs or confined showers. In various markets, a meticulously executed wet room can elevate resale prices by multiple percentage points.
Detailed Cost Analysis
The following provides a nationwide overview. Expenses fluctuate based on location and the extent of plumbing alterations or surface selections.
| Task | Typical Cost | Influencing Factors |
|---|---|---|
| Full wet room conversion | $12,000 to $25,000 | Room dimensions, tile variety, design intricacy |
| Waterproofing system | $1,200 to $3,000 | Product brand, surface area |
| Drain and slope installation | $800 to $2,000 | Subfloor state, drain configuration |
| Tiling and grout application | $3,000 to $6,000 | Tile composition, installation pattern |
| Fixtures and fittings | $2,000 to $5,000 | Material quality, surface treatment, manufacturer |
| Labor | $4,000 to $8,000 | Contractor fees, geographic location |
Opting for a do-it-yourself approach may halve labor expenses, yet it heightens the chance of water infiltration issues. Professional involvement remains advisable for waterproofing and drainage elements.
Essential Tools and Materials
Tools
- Wet saw for precise tile cutting
- Trowels and spacers for even application
- Level and straightedge for alignment checks
- Mixing paddle and bucket for adhesives
- Caulk gun for sealing
- Utility knife for adjustments
Materials
- Waterproof boards or membrane sheets
- Tile adhesive and grout compounds
- Linear or point drain assembly
- Floor slope panels or screed mixtures
- Silicone sealant for joints
- Vent fan equipped with ducting
- Slip-resistant tile options
Preparing these items in advance streamlines the project timeline and maintains workflow efficiency.
Deciding Between DIY and Professional Installation
Consider DIY When
- You possess prior experience with tile work.
- Existing plumbing configurations remain unchanged.
- You adhere strictly to waterproofing protocols.
Opt for Professional Services When
- Relocating drains or fixtures is necessary.
- Subfloor requires leveling or structural reinforcement.
- Warranty protection is a priority.
Professionals excel in achieving compliant slopes, effective drainage, and robust waterproofing. They conduct membrane integrity tests prior to tiling.
Warranty invalidation occurs through omissions like primer applications, incompatible waterproofing brands, or post-installation penetrations into sealed zones.
Adapting to Regional and Climate Considerations
In cooler climates, incorporate underfloor heating to mitigate condensation and accelerate drying times. Select insulated waterproof panels to minimize thermal loss.
For humid or coastal environments, employ mold-resistant grout and fixtures resistant to corrosion. Materials such as stainless steel or brass outperform chrome-plated alternatives in durability.
Properties in flood-risk zones benefit from elevating electrical outlets beyond typical bathroom specifications. Compliance with stringent water conservation regulations calls for low-flow showerheads that maintain adequate spray distribution.
Verify local ordinances prior to tub removal, as certain jurisdictions mandate retaining at least one bathtub for resale eligibility.
Pitfalls to Sidestep in Wet Room Projects
- Inadequate drainage gradient: Minor irregularities lead to water accumulation.
- Incompatible waterproofing components: Utilize a single cohesive system from primer through membrane.
- Neglected flood testing: Simulate water retention in the base prior to tiling to verify seal integrity.
- Slick floor surfaces: Avoid glossy tiles, which become hazardous under wet conditions.
- Insufficient airflow: Accumulated steam erodes finishes and grout integrity.
- Substandard grout protection: Inferior sealants degrade quickly, permitting moisture intrusion.
Addressing these issues post-construction incurs significantly higher expenses than initial prevention.
Sustaining Your Wet Room Over Time
Properly constructed wet rooms demand straightforward upkeep.
Daily surface wiping prevents residue accumulation from soaps and shampoos. Reapply grout sealant biennially or triennially to maintain barriers. Regularly clear drains of obstructions like hair and particles.
Operate the ventilation fan for a minimum of 15 minutes following showers to expel humidity. Annually examine caulk lines for deterioration and renew as required.
These routines safeguard your investment and preserve the space's pristine condition.
Expert Strategies for Optimal Results
Conduct a 24-hour water retention test on the waterproofing layer before proceeding to tiles, adhering to established industry benchmarks. Employ a laser level for accurate drain slope establishment.
Procure all tiles and supplies simultaneously to ensure consistent patterns and colors. Select fixtures featuring antimicrobial or easy-wipe surfaces to simplify cleaning.
Document the waterproofing and plumbing configurations photographically prior to enclosure. Such records facilitate any subsequent maintenance efforts.
Precision defines wet room success; each component contributes to overall performance.
Implementing Your Wet Room Upgrade
A wet room stands as a strategic choice for prompt home value enhancement. Approach the project with meticulous planning, comprehensive waterproofing, and premium materials.
Begin by assessing your available space and establishing a feasible budget. Determine whether to manage select tasks independently or engage a comprehensive contractor service.
Upon completion, the wet room simplifies everyday use while captivating potential purchasers. Beyond fleeting popularity, it represents a commitment to enduring comfort, elegance, and financial gain.
Frequently Asked Questions
Does a wet room require a specialized floor?
Yes, the flooring demands a precise slope and complete waterproofing via a tanking system.
Is upstairs installation feasible for a wet room?
Yes, provided joists support the load and full waterproofing is applied. Consult a professional to evaluate structural adequacy.
What approach minimizes wet room expenses?
Retain current plumbing positions and incorporate porcelain tiles over natural stone varieties.
Is a permit necessary for wet room construction?
Typically, yes, when altering drains or electrical elements. Contact your local building authority prior to commencement.
What is the expected lifespan of a wet room?
With meticulous waterproofing and routine maintenance, it endures for decades absent leaks or structural issues.