Wet Rooms Replacing Tubs Add 11 Percent to Your Home Value
A full wet room can raise your home value by about 11 percent. Buyers appreciate the clean appearance, easy access, and spa like atmosphere. The project delivers more space along with improved style and function.
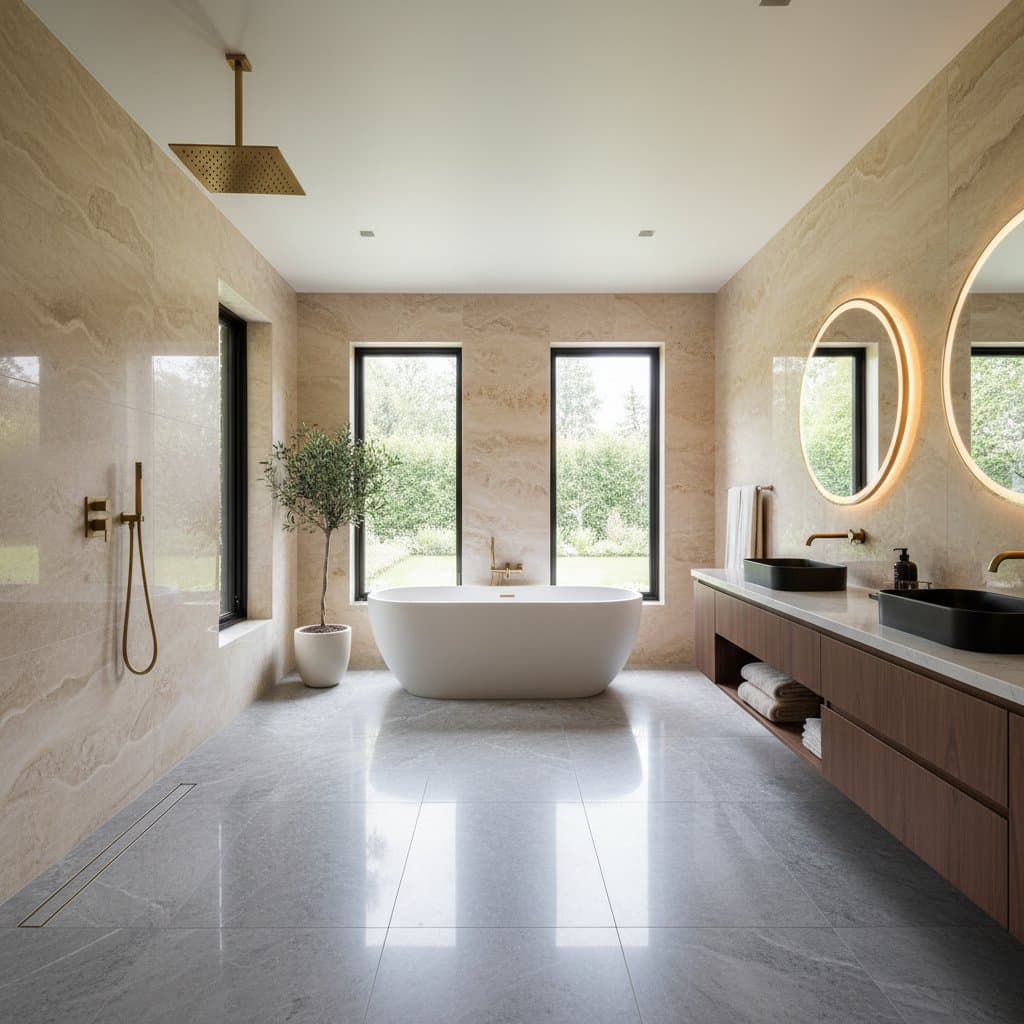
What Defines a Wet Room
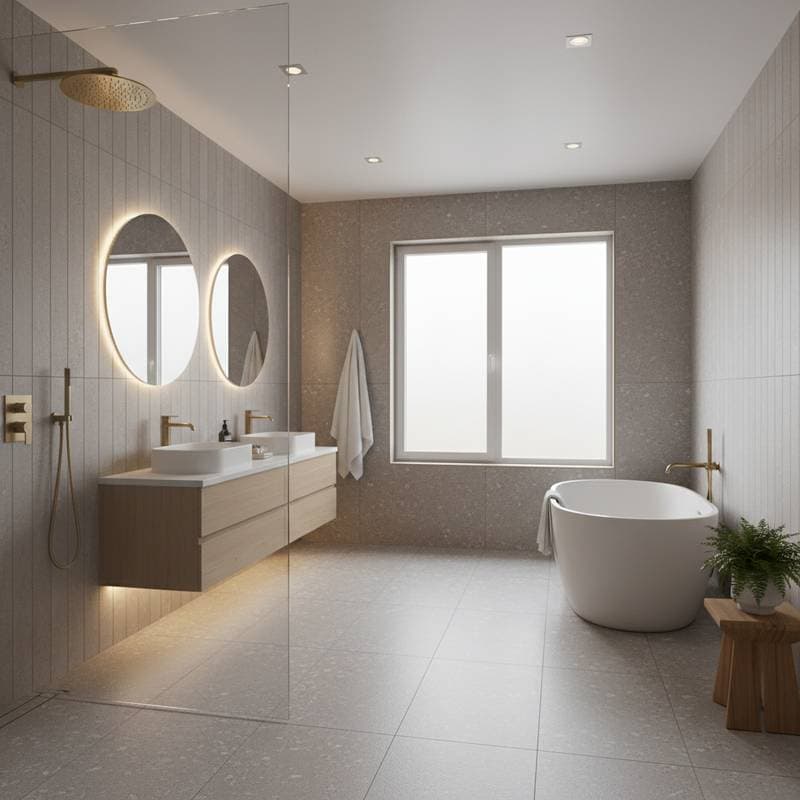
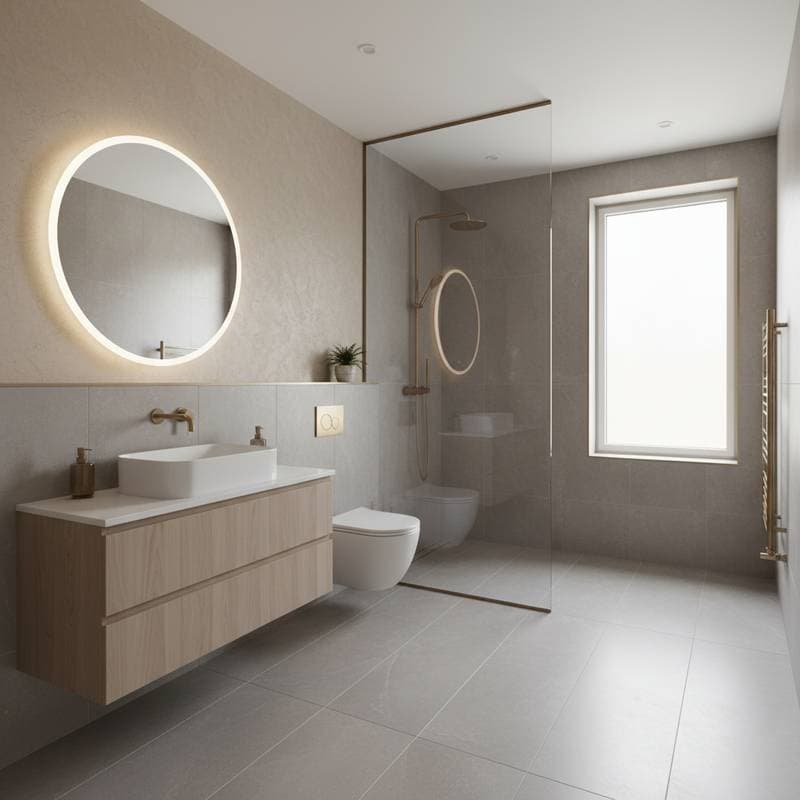
A wet room consists of a fully waterproof bathroom that features an open curbless shower. The floor slopes gently toward a central drain with no tub or raised base present. This design handles water across the entire surface.
The layout produces a seamless modern appearance that enlarges the feel of smaller bathrooms. It also improves safety for individuals with limited mobility because steps and lips are eliminated.
Steps to Construct a Wet Room
- Plan the layout. Position the drain, shower, and toilet to keep plumbing near existing lines and reduce expenses.
- Waterproof the space. Apply a tanking system or waterproof boards to floors and walls to prevent leaks.
- Create a sloped floor. Install a gentle incline toward the drain using a preformed tray or custom mortar bed.
- Select the flooring. Choose slip resistant tiles or microcement that resists moisture absorption.
- Install fixtures. Mount toilets and vanities on walls with minimalist fittings to preserve the open layout.
- Finish and seal. Test the drain for leaks and apply silicone sealant designed for wet areas.
Cost Breakdown
Prices differ by region, materials, and existing structure. The following table shows national averages.
| Task | Typical Cost | Factors That Affect Price |
|---|---|---|
| Waterproofing and prep | 2000 to 4000 dollars | Room size, floor slope, and drainage access |
| Tile and finishes | 3000 to 6000 dollars | Tile type, pattern complexity, and labor quality |
| Fixtures and fittings | 1500 to 3000 dollars | Brand selection, finish options, and mounting style |
| Labor | 2000 to 5000 dollars | Local rates, project complexity, and plumbing changes |
| Total | 8500 to 18000 dollars | Custom elements, material choices, and layout |
Project Timeline
A complete wet room renovation requires one to three weeks. Active construction occupies eight to twelve working days. Additional time for drying and sealing ranges from two to five days based on materials used. Plumbing reroutes or tile availability often extend the schedule.
DIY Versus Professional Installation
Consider DIY only when you possess prior experience with tiling and plumbing. Limit this approach to small secondary bathrooms and use kits that include pre sloped panels.
Hire professionals when waterproofing is new to you or when drains and wiring require relocation. Professional work supports resale value through guaranteed waterproofing and warranties. Poor DIY efforts risk leaks that create hidden damage and reduce the value gain.
Required Tools and Materials
- Waterproofing membrane or boards
- Tile adhesive and grout
- Pre sloped shower tray or mortar mix
- Silicone sealant rated for wet areas
- Slip resistant tile or microcement
- Level, trowel, and tile cutter
- Drain assembly and waterproof tape
Wear gloves, goggles, and knee pads during work. Shut off the water supply before removing any fixtures.
Reasons Wet Rooms Increase Value
Buyers view wet rooms as modern, low maintenance, and accessible. The open design enlarges even compact bathrooms visually. These spaces suit users of all ages and abilities, which broadens market appeal.
Tub removal once lowered resale prices, yet preferences have shifted. Most owners now favor spacious walk in showers over unused tubs. The reported 11 percent value increase reflects this change combined with quality design execution.
Regional and Climate Considerations
In cold climates add underfloor heating to speed drying and reduce cold tile contact. Humid regions benefit from mold resistant grout and robust ventilation fans. Older homes require subfloor inspection for rot before work begins. Local codes may mandate permits for new drains or waterproofing systems.
Safety and Accessibility Features
Wet rooms reduce trip risks and support wheelchair use. Select tiles with appropriate slip ratings and textured surfaces. Position grab bars near the shower and toilet when accessibility matters. Place drains away from main walkways to avoid standing water.
Situations That Require Professional Help
Contact a licensed plumber or bathroom contractor when water or electrical lines need rerouting. Seek assistance if mold or moisture damage appears behind existing tile. Professional installation provides warranty backed waterproofing especially when listing the home for sale.
Practical Tips for Best Results
Test waterproofing by flooding the area before tiling begins. Use larger tiles to minimize grout lines and maintain a clean appearance. Install a frameless glass screen if water splash is a concern. Maintain a floor slope of one quarter inch per foot. Select LED fixtures rated for wet locations.
Common Questions
Do wet rooms require a separate shower screen?
No requirement exists, yet a half glass panel protects towels and the toilet area from moisture.
Can installation occur on a wooden floor?
Yes, provided the subfloor receives reinforcement and proper tanking boards.
What is the cost for a small wet room?
A compact space with midrange finishes typically ranges from 7000 to 10000 dollars.
Planning Your Wet Room Project
Begin with a clear assessment of your current bathroom layout and plumbing access. Prioritize professional waterproofing to protect the investment. The result delivers a safer, more spacious bathroom that aligns with current buyer preferences and supports long term home value.