The Rising Popularity of Wet Rooms and Their Impact on 2026 Home Values
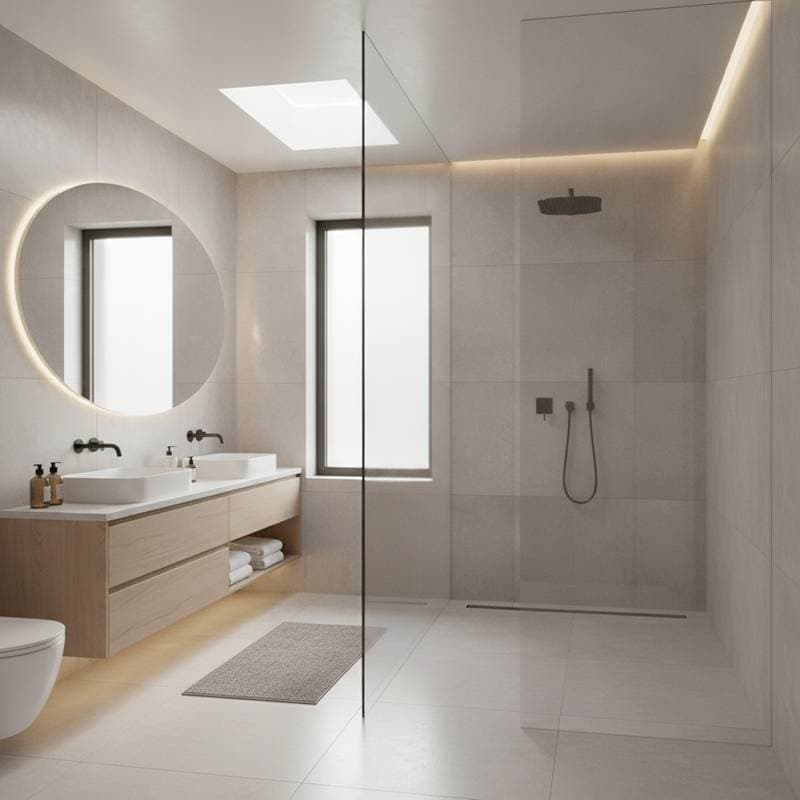
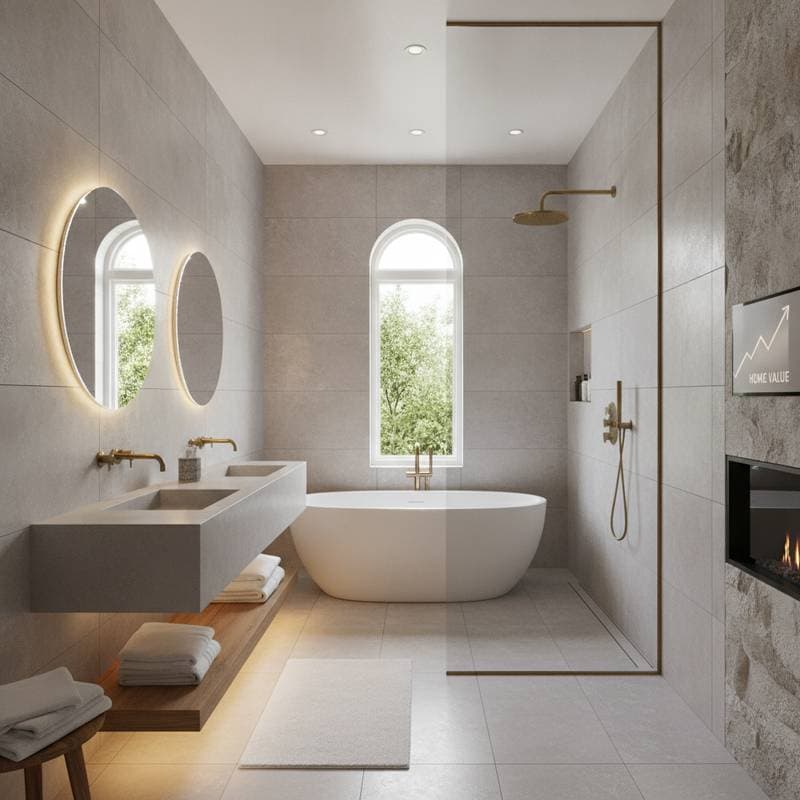
Wet rooms represent a shift toward seamless, waterproof bathroom designs that eliminate traditional barriers like shower trays and curtains. These open-plan spaces feature fully tiled floors with subtle slopes leading to drains, creating an expansive and luxurious feel. In 2026, experts predict that installing a wet room in your primary bathroom will yield an average 11 percent increase in overall home value, based on current real estate trends favoring accessible and low-maintenance features.
This boost stems from buyer preferences for modern, aging-in-place designs that prioritize safety and ease of use. A full conversion typically requires an investment of $14,000 to $22,000, influenced by room dimensions, material selections, and local labor rates. Proper execution not only enhances daily functionality but also positions your property favorably in competitive markets, where updated bathrooms command premium prices.
Breaking Down the Costs of a Wet Room Conversion
Understanding the financial aspects helps homeowners budget effectively for this renovation. Costs vary based on several interconnected factors, each contributing to the project's total expense and long-term performance.
1. Room Size and Layout Considerations
For a standard 5-by-8-foot bathroom, expect costs to range from $14,000 to $16,000. This includes basic demolition, floor leveling, and installation of a single shower area. Larger rooms, such as those exceeding 8 by 10 feet, or designs incorporating dual showerheads and separate vanities, can elevate expenses to $20,000 or higher.
Smaller layouts benefit from minimalist fixtures that maximize perceived space, while expansive ones allow for zoning wet and dry areas with partial partitions. Always measure your space precisely and consult floor plans to avoid underestimating structural adjustments.
2. Essential Waterproofing Systems
Waterproofing forms the foundation of any wet room, preventing moisture from penetrating subfloors and walls. High-quality liquid-applied membranes or preformed tanking sheets typically add $2,000 to $4,000 to the budget.
These systems involve applying multiple layers to floors, walls up to shoulder height, and around fixtures. Cutting corners here invites rapid deterioration; for instance, inadequate sealing can lead to subfloor rot within months. Opt for systems certified for wet environments to ensure durability and compliance with building standards.
3. Material Selections for Tiles and Drains
Tile choices significantly affect both aesthetics and cost. Porcelain options, valued for their water resistance and affordability, range from $4 to $8 per square foot installed. Natural stone varieties, offering a premium texture and warmth, command $10 to $20 per square foot.
Drains play a crucial role in functionality. Point drains sit flush but may require precise sloping, whereas linear drains, spanning wall to wall, provide a sleeker appearance and faster water evacuation at a higher upfront cost of $300 to $800 each. Select materials that align with your design vision while prioritizing slip-resistant surfaces for safety.
4. Labor, Permits, and Regulatory Requirements
Professional labor accounts for $6,000 to $9,000, covering plumbing modifications, waterproofing application, and tile setting. This phase demands skilled tradespeople familiar with creating the necessary 1 to 2 percent floor slope for effective drainage.
Permits add another layer, often costing $200 to $500 depending on your location. Inspections focus on drainage efficacy, electrical placements away from wet zones, and adherence to plumbing codes. Factor in these steps early to prevent delays, as approval processes can extend timelines by one to two weeks.
5. Optional Enhancements and Contingency Planning
Enhancements like underfloor heating, frameless glass enclosures, or integrated seating can increase costs by $1,500 to $3,000. These features elevate comfort and luxury, appealing to buyers seeking spa-like retreats.
Allocate an additional 10 to 15 percent of your budget for unforeseen issues, such as repairing outdated subfloors or addressing mold from prior leaks. Comprehensive planning mitigates these risks and ensures a smooth project rollout.
Weighing DIY Options Against Professional Installation
Homeowners often debate whether to tackle a wet room conversion themselves or enlist experts. Each approach carries distinct advantages and potential pitfalls.
Scenarios for DIY Success
Consider a DIY route if you possess experience in tiling and grasp the principles of slope grading for drainage. Follow manufacturer instructions meticulously when using complete waterproofing kits, which include primers, membranes, and sealants.
You must also handle basic plumbing tasks, such as aligning drains and shutting off water supplies safely. This method suits smaller projects where precision tools and time are available, potentially saving $3,000 to $5,000 in labor fees.
When to Engage Professionals
Hire specialists if your bathroom reveals subfloor irregularities, uneven joists, or the need for electrical rewiring. Complex rerouting of pipes or integration with existing HVAC systems demands licensed expertise to avoid code violations.
Professionals guarantee a superior finish that maximizes resale value, often backed by insurance and warranties. Their involvement proves essential for intricate designs or when aiming for that 11 percent value uplift through flawless execution.
Key Risks Associated with DIY Efforts
The primary dangers involve improper waterproofing, leading to persistent leaks, mold proliferation, and costly structural repairs exceeding $10,000. Inadequate sealing at seams, corners, or drain connections compromises the entire system.
Without professional calibration, floors may not drain efficiently, fostering standing water and slip hazards. If uncertainty arises at any stage, pivot to hiring a contractor to safeguard your investment and home integrity.
Long-Term Maintenance and Warranty Essentials
A properly constructed wet room endures 20 to 30 years with routine care, preserving its value-enhancing qualities. Regular upkeep focuses on preventing minor issues from escalating into major problems.
Reapply grout sealant every two to three years and inspect drain channels quarterly for debris accumulation. Use mild cleaners to avoid degrading silicone seals or tile finishes; harsh chemicals accelerate wear on protective layers.
Common Failure Points and Prevention
Grout lines and silicone applications in corners degrade first, showing cracks or discoloration after five to seven years. Address these promptly by regrouting or resealing to block moisture intrusion.
Many contractors provide 5- to 10-year warranties on waterproofing components when installed by certified teams. Retain records of materials used, installation dates, and inspection reports; these documents bolster credibility during home sales and support warranty claims.
Design Strategies to Maximize Appeal and Functionality
Effective wet room designs blend practicality with visual allure, directly influencing buyer interest. Prioritize barrier-free access by incorporating grab bars and non-slip tiles, aligning with universal design principles.
Choose neutral color palettes with metallic accents for timeless elegance, or introduce bold textures via mosaic accents for personality. Integrate smart storage, such as recessed niches or floating vanities, to maintain an open feel without sacrificing utility.
Lighting enhances the space: Recessed LEDs provide even illumination, while dimmable options create ambiance. These elements not only improve daily use but also highlight the room's modernity, contributing to that projected 11 percent value increase.
Steps to Launch Your Wet Room Project
Embark on this upgrade with a structured approach to ensure efficiency and satisfaction.
-
Evaluate your bathroom's suitability by inspecting floor height and structural support for waterproofing layers.
-
Solicit quotes from at least three contractors, emphasizing their experience with waterproof systems over superficial design proposals.
-
Inquire about material lead times, as custom tiles or glass can delay projects by four to six weeks.
-
Verify permit requirements with local authorities, particularly for drainage and moisture-related modifications.
-
Prepare for the installation period, which spans two to four weeks, by securing temporary bathing alternatives.
Wet rooms transform bathrooms into safe, streamlined havens that resonate with contemporary lifestyles. Through meticulous waterproofing and thoughtful design, this renovation safeguards your property while delivering aesthetic and functional benefits that endure, ultimately securing a stronger position in the 2026 real estate landscape.