Understanding Wet Rooms and Their Value
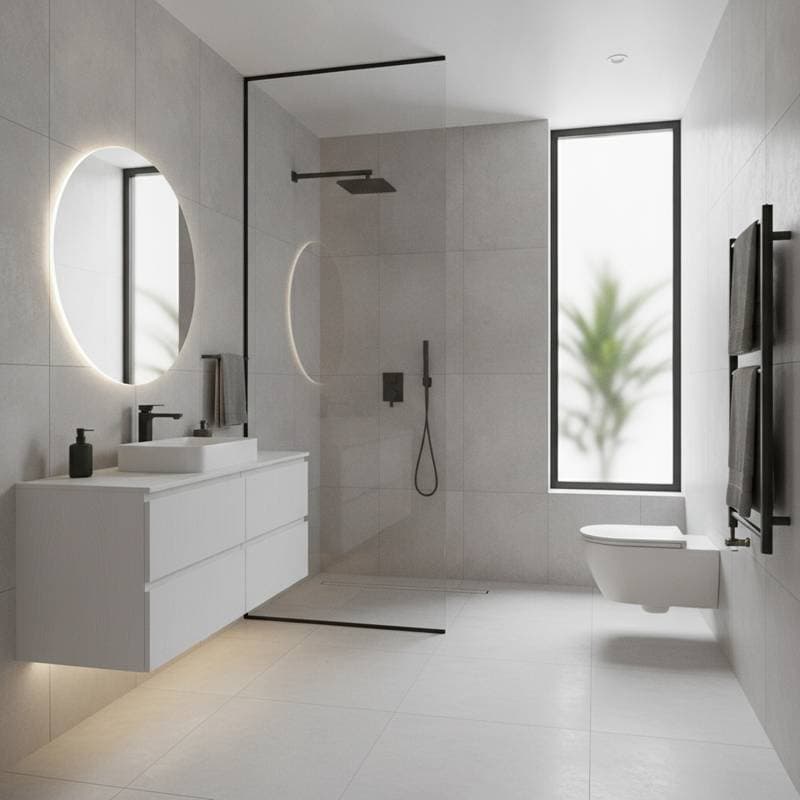
Wet rooms represent a seamless integration of shower areas into the bathroom floor, eliminating curbs and enclosures for a fluid, modern aesthetic. This design maximizes space in compact urban dwellings, where every square foot counts toward comfort and functionality. Homeowners increasingly choose wet rooms for their adaptability and long-term appeal in resale scenarios.
The investment in a wet room conversion often yields a 15% higher return on investment compared to standard shower installations. This boost stems from the perceived luxury and efficiency, attracting buyers in competitive markets. Data from recent housing trends indicates that such upgrades can elevate property values by emphasizing contemporary living standards.
Costs and Return on Investment
A typical wet room project ranges from $16,000 to $18,000, encompassing demolition, waterproofing, tiling, and fixtures. Factors influencing cost include room size, material selections, and local labor rates. Urban areas may incur higher expenses due to permitting complexities and material transport.
The 15% ROI advantage arises from enhanced marketability. Buyers view wet rooms as premium features that reduce maintenance and improve accessibility, particularly for aging-in-place modifications. In 2025's urban market, where space efficiency drives demand, this upgrade positions properties favorably against standard bathrooms.
Design and Planning Essentials
Begin the process with a detailed layout that positions the drain centrally for optimal water flow. Select non-slip tiles and tempered glass panels to ensure safety without sacrificing style. Consider natural light sources to amplify the room's airy feel.
Professional designers recommend integrating storage solutions, such as recessed shelves, to maintain a clutter-free environment. Wall-mounted fixtures further streamline the space, facilitating easier cleaning and a minimalist appearance.
Permit Requirements
Relocating drains or adding electrical elements necessitates permits to comply with building codes. Waterproofing systems require inspection prior to tiling to verify integrity. In multi-unit residences, coordinate with property management to align plumbing work with building schedules and minimize disruptions.
Secure approvals early to prevent project halts. Consult local regulations, as urban jurisdictions often enforce stringent guidelines for water containment and electrical safety.
Installation Best Practices
Prepare the site by removing existing tubs or showers, then apply a robust waterproof membrane across floors and walls up to the desired height. Ensure proper sloping toward the drain, typically a one-quarter-inch drop per foot, to facilitate drainage.
Incorporate ground-fault circuit interrupter outlets for all electrical components, safeguarding against moisture-related hazards. Hire certified installers experienced in wet room systems to guarantee durability.
Step-by-Step Guide
-
Develop a precise design sketch, noting drain location, tile elevations, and glass dimensions.
-
Obtain quotes from at least three contractors, scrutinizing breakdowns for labor, materials, and contingencies.
-
Verify permit needs and book inspections ahead of demolition to streamline timelines.
-
Procure extended-lead materials, including specialized drains, tiles, and panels, prior to starting work.
-
Establish a provisional bathing area if this is your sole bathroom; options include portable enclosures or temporary facilities.
-
Monitor progress daily, verifying slope accuracy, tile leveling, and membrane application before proceeding.
-
Collect all warranty documents and maintain records for future reference, especially during property sales.
Common Pitfalls and Prevention Strategies
Grout cracking often results from structural shifts or inadequate base preparation. Mitigate this by employing flexible sealants and installing expansion joints in vulnerable areas like corners.
Drain odors or blockages can emerge from residue buildup; counteract them with routine flushing using hot water and gentle cleaners, steering clear of corrosive substances.
Water accumulation signals flawed gradients; address promptly to prevent subfloor penetration. For glass surfaces, regular wiping prevents etching from mineral deposits, preserving clarity.
Membrane punctures typically occur during post-installation modifications; opt for surface-attached hardware with integral waterproofing to avoid compromises.
Recommended Enhancements
Incorporate radiant floor heating to promote warmth and accelerate drying, thereby diminishing slip hazards. A wall-hung toilet conserves floor area and eases maintenance routines.
Install linear LED strips for superior illumination and a sophisticated ambiance at a modest expense. Choose matte-finish floor tiles for reliable traction paired with subtle elegance.
These additions not only refine the user experience but also underscore the bathroom's modernity, contributing to the overall ROI.
Timing Considerations
Monitor market fluctuations in tile and glass supplies; if prices escalate, delay commencement until materials are locked in to avert costly revisions. Align projects with contractor availability and reliable delivery chains for efficiency.
A brief postponement often proves economical compared to mid-project adjustments.
Actionable Next Steps
Assess your bathroom dimensions and evaluate the feasibility of retaining the existing drain configuration. Establish a budget of $16,000 to $18,000, allocating 10% for unforeseen elements.
Engage a qualified waterproofing specialist for an in-person assessment and estimate. Anticipate two to four weeks of limited bathroom access during construction.
Document all expenditures and approvals meticulously, as these records substantiate the upgrade's value in resale negotiations.